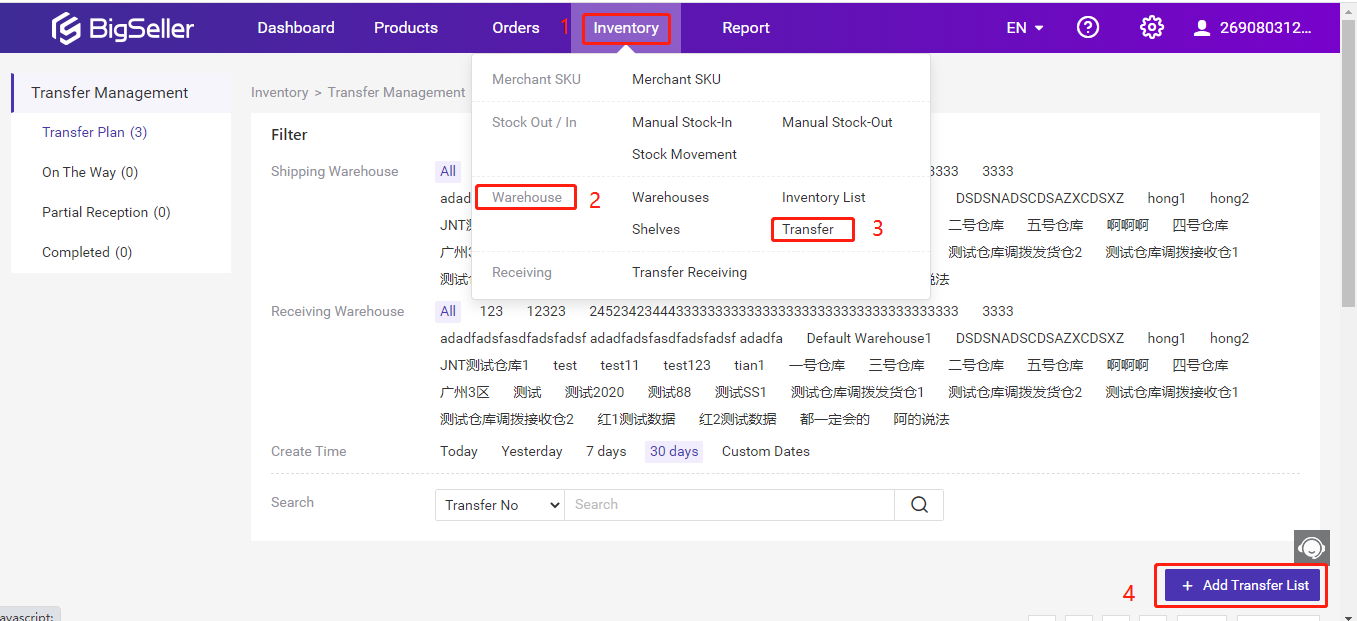
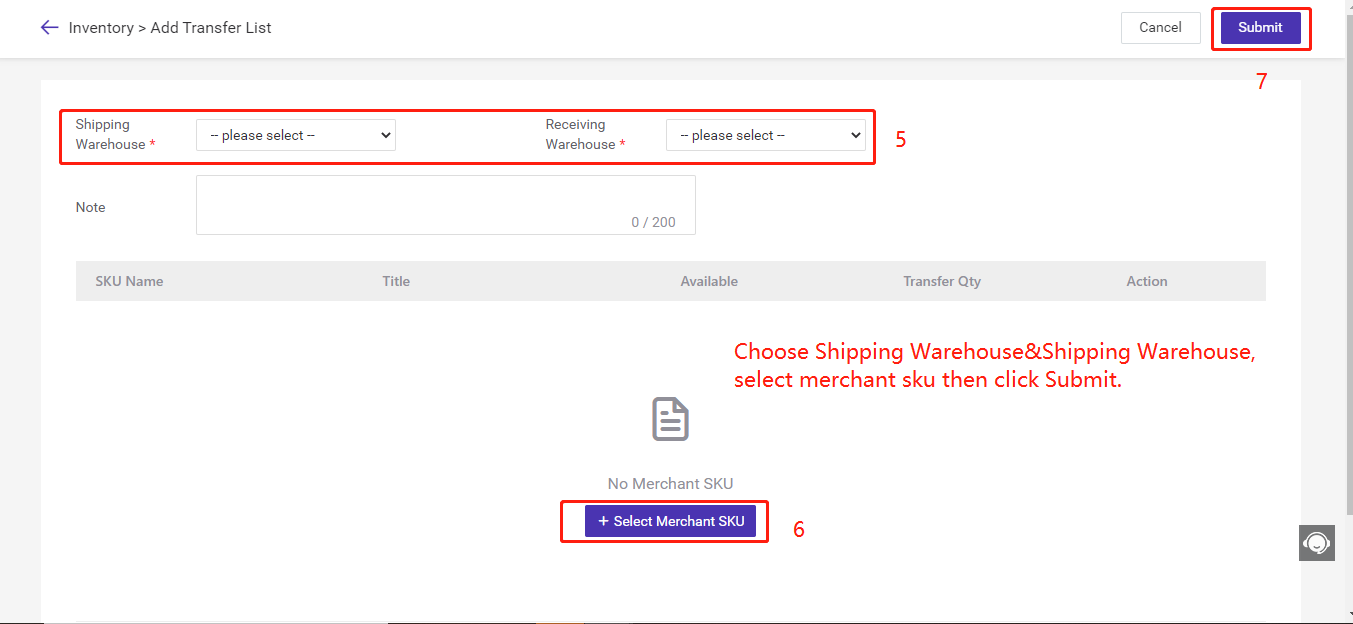
Go to Inventory > Warehouse > Transfer > Transfer Plan > Add Transfer List > Fill in the list > Submit
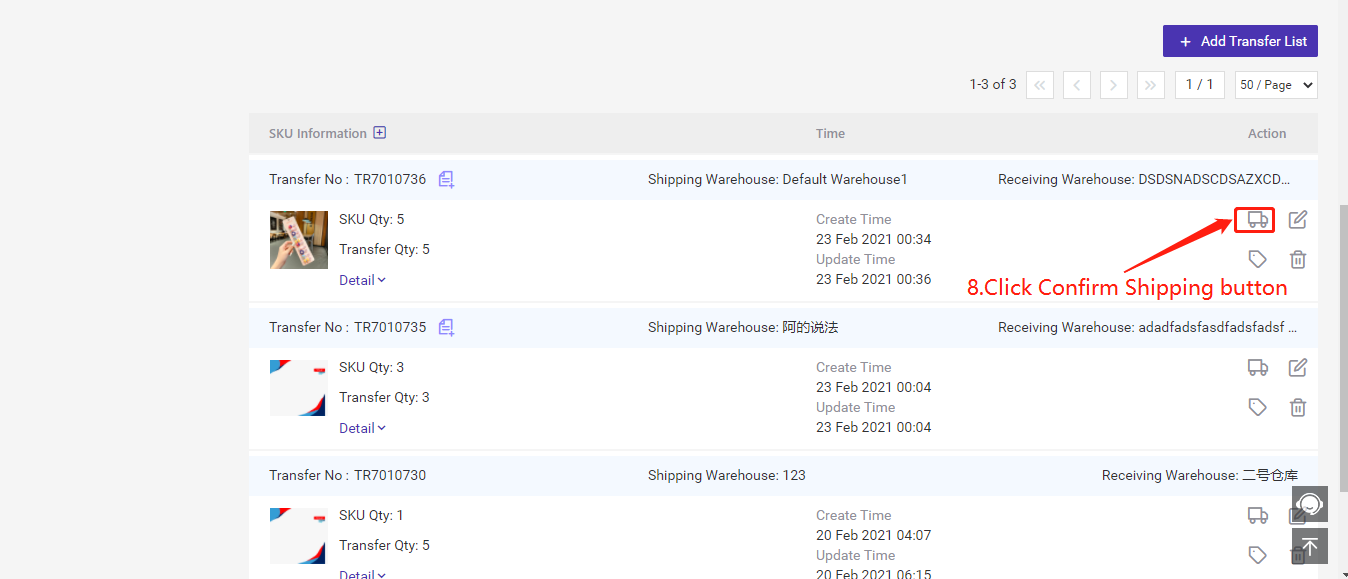
Step 2: Confirm shipping after the goods were shipped from warehouse
In the opening page(or click Inventory > Warehouse> Transfer > Transfer Plan), locate the transfer list, click the Confirm shipping icon after confirming the goods have been shipped. Then the transfer list will move to On The Way page and also appear in Transfer List page of Transfer Receiving.If the consignee receives only a part of the goods (received quantity
If the consignee receives all the goods(received quantity
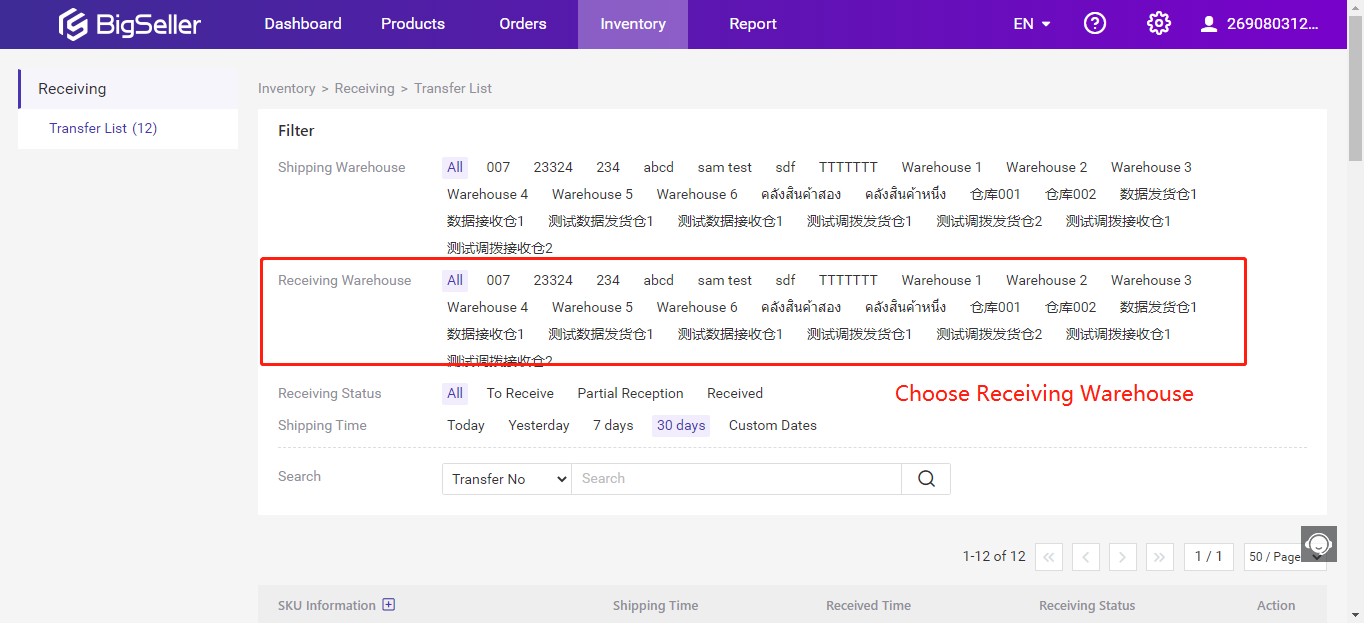
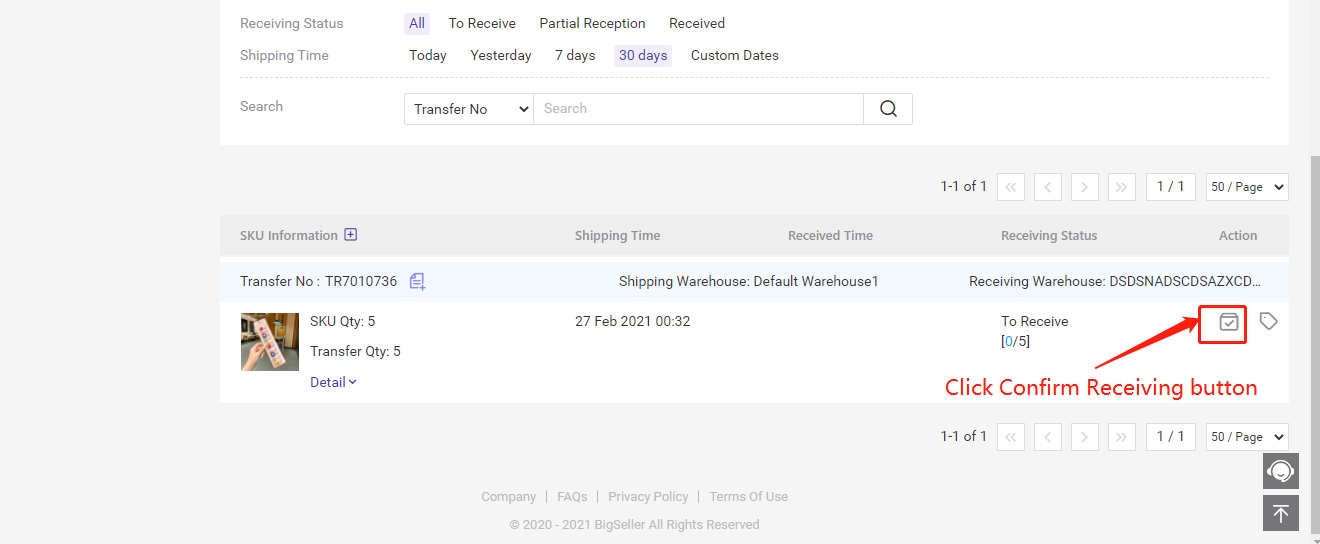
Step 3: Consignee confirms receipt after the goods arrive at the receiving warehouse
Go to Inventory > Transfer Receiving > Receiving Warehouse > click on Confirm Receiving button > enter received quantity> Confirm
If all goods are received(received quantity=transfer quantity), the receiving status of transfer list will be changed to Received.
If only a part of the goods is received (received quantity
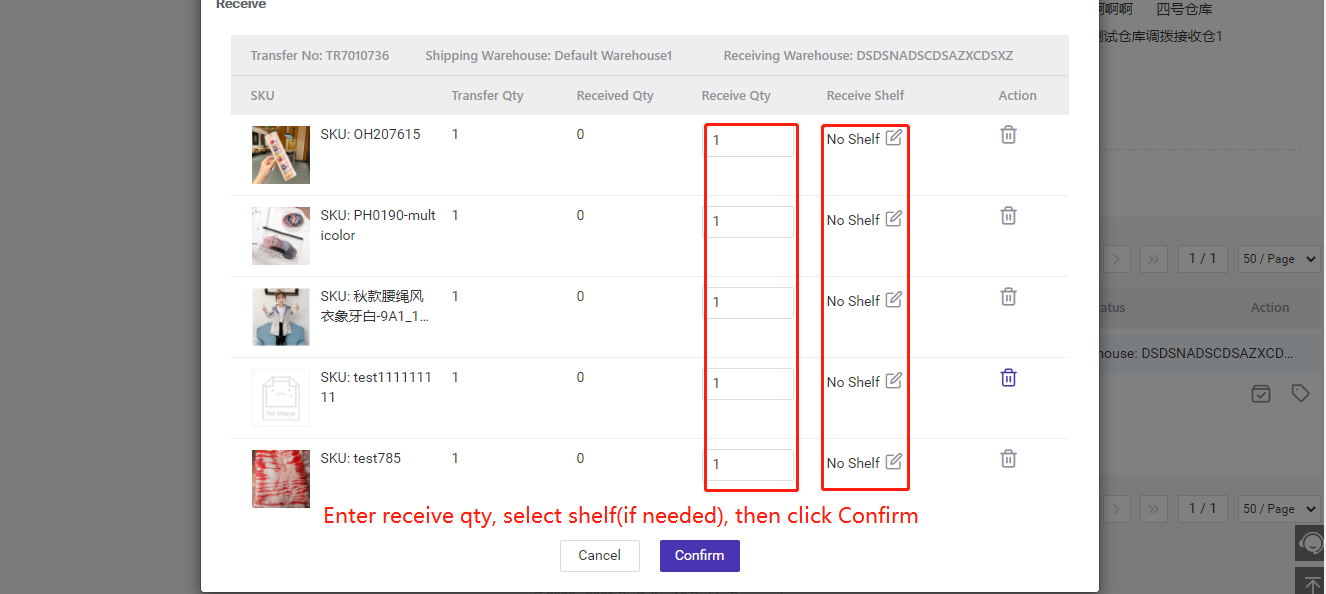
After confirming, the goods will be in stock immediately and the number will increase.